

Using Azure Automation & PowerShell for Slack channel notifications
There are plenty of great Slack apps that exist already.
But you are after an integration with a system that does not have an app or an existing app does not work just quite right for you, thankfully there is an easy way to write your own.
For this post I will demonstrate how you can get daily notifications in your Slack channel from a table containing peoples birthday and work anniversaries in Confluence. The solution will be hosted in Azure Automation with a daily Schedule defined so you won’t have to think about it again once its all up and running.
NOTE You don’t NEED confluence to do this, you can pull your data from any data source, or it could even just be a trigger event. i.e. something happens and you post a message to a Slack channel. It’s completely up to you!
Confluence Table
First we need a table on a Confluence page. If you want to use confluence for this and don’t have a site to use, Atlassian have free trials available.

The above shows a sample table, with columns for the person’s name, birthday and when they joined the company. There is also an additional column for if we show their age in the Slack message as some people might be sensitive about broadcasting their age to everyone!
NOTE: If you want to know the shortcut for entering date fields in a table use // in the editor to create one!
Slack Incoming WebHooks
We need a Slack site to receive the notifications.
If you don’t already have a Slack team, you can join for free on their homepage and just follow the prompts.
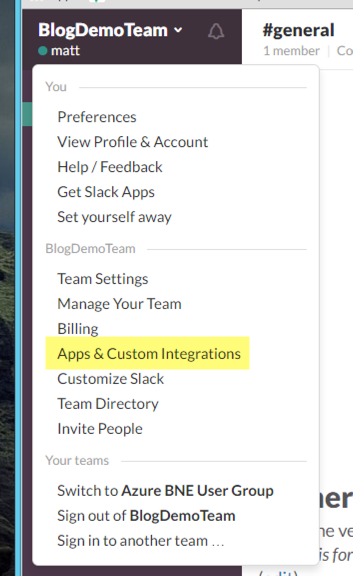
Once you have a Slack team with the two default channels of #general and #random, click on the team name at the top left. Select Apps & Custom Integrations
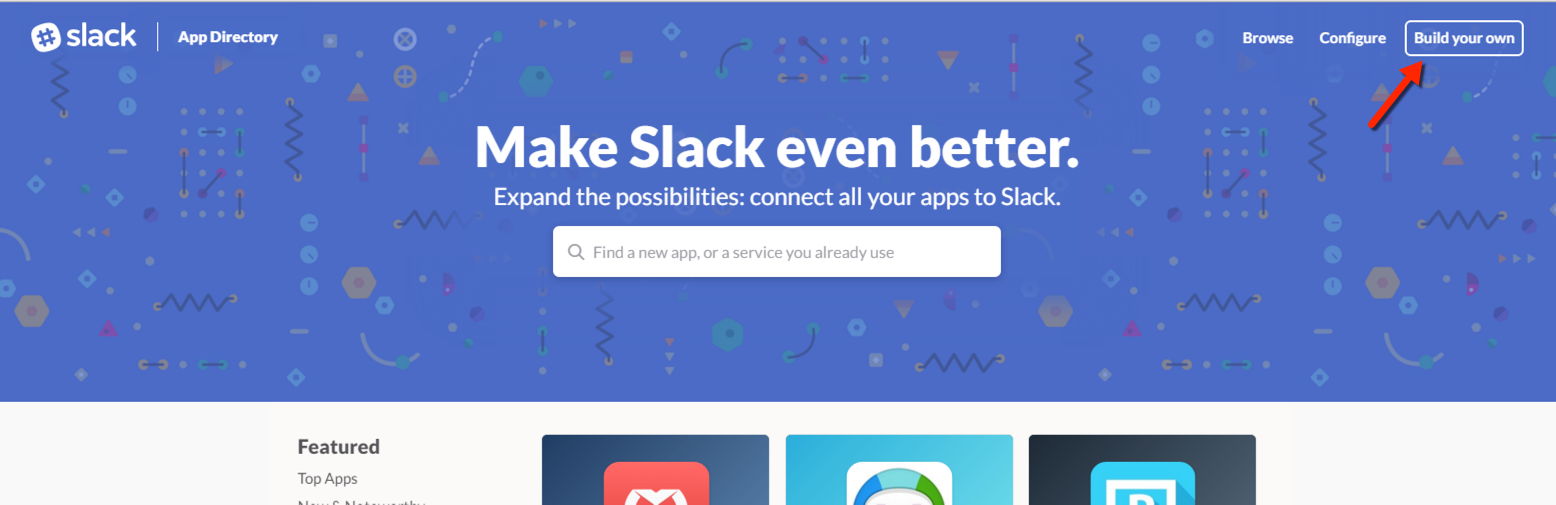
Select Build your Own from the top right.
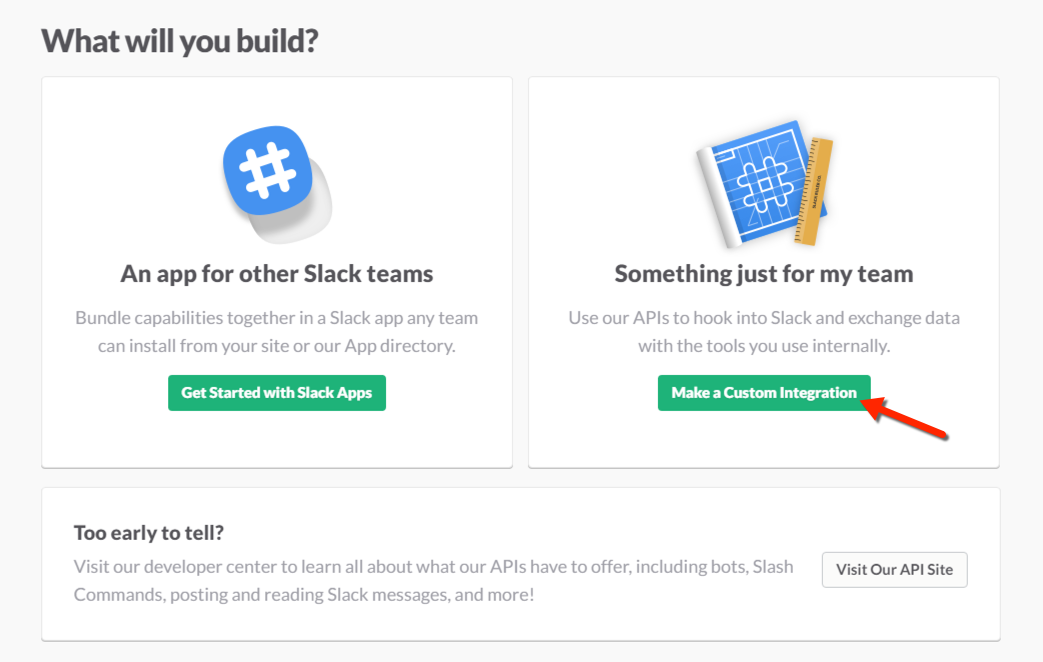
We will be creating an integration for just our team. Click on Make a Custom Integration.
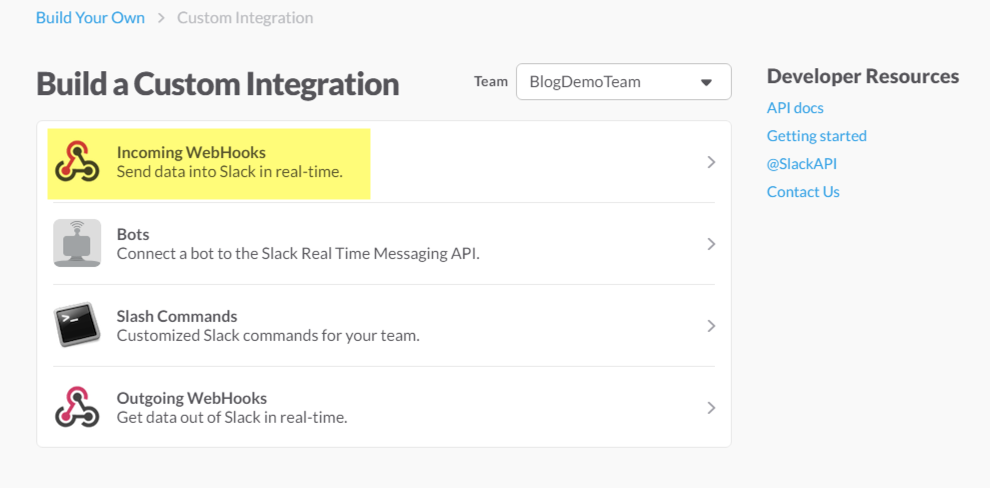
There are four different custom integration types available for Slack. The one we will be utilising is the Incoming WebHooks. Click on Incoming WebHooks.
Select a default Channel. (this can be changed later) and click on Add Incoming WebHooks Integration.
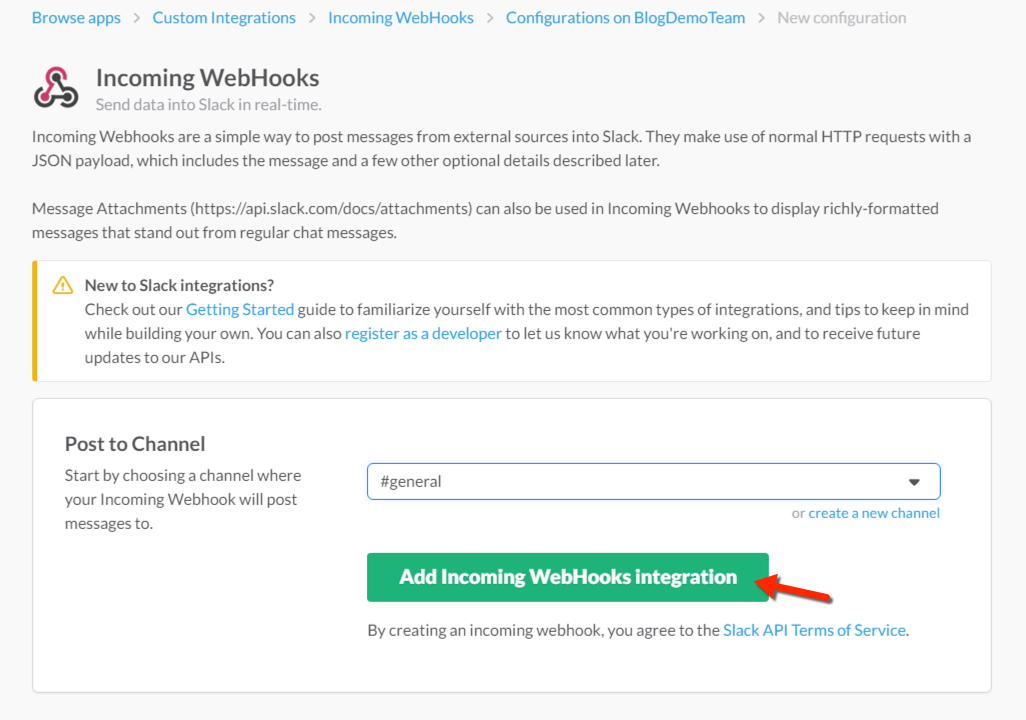
Make sure you take a copy of the URL for the webhook as that is needed later.
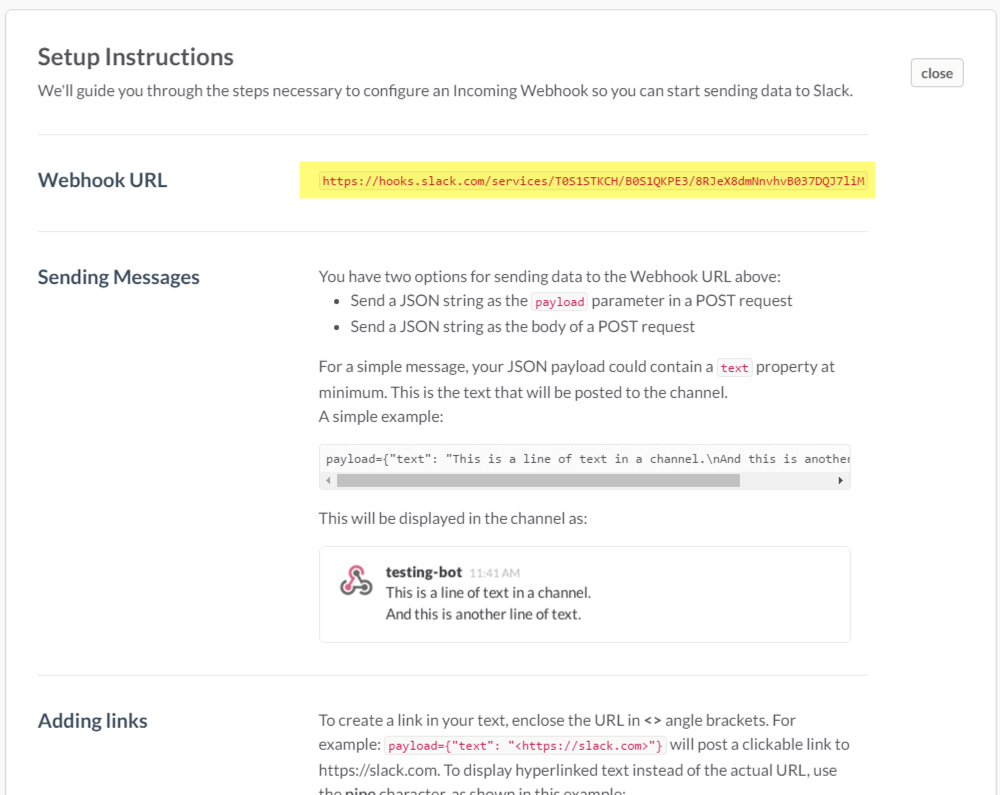
The Slack API documentation is excellent. I would highly recommend reading the rest of this page to see what kind of features you can add to your custom integration!
So that completes creating our source data and destination systems. Not so hard right?
PowerShell Script
The glue that joins them together is a PowerShell script. I have a copy of what I use below.
You will need to make some modifications before you can run it. These are the variables you will need to change:
| Variable Name | Description |
|---|---|
| $slackUrl | This is your Slack team’s Incoming WebHook URL that was just generated earlier. This should be a straight cut and paste from the Slack Incoming Webhooks page. |
| $wikiSpace | The confluence space key. Usually a three letter prefix. |
| $wikiPageTitle | The title of the wiki page you need to search for. HINT: This is case sensitive! |
| $wikiBaseUrl | The base URL for the confluence site in question. |
| $wikiUsername | The username for the confluence site. |
| $wikiPassword | The password for the confluence site. |
Don’t be too concerned about putting your password into a test script. Once we move it to Azure Automation, we will take steps to secure it. More on that further down.
Once those six variables are set correctly, you should be able to run the PowerShell script locally and see the output displayed in your slack channel.
Notes about the script
There are two interesting gotchas in the script that I will point out.
Since what we are doing is date based calculations, it is advisable to convert any “current” date time objects to your current timezone. This is to ensure that you won’t be comparing dates where one is off by about 10 or so hours. (as is often the case with us Aussies).
As it currently stands, if you use Invoke-WebRequest using standard parameters in an Automation script, you will get the following error:
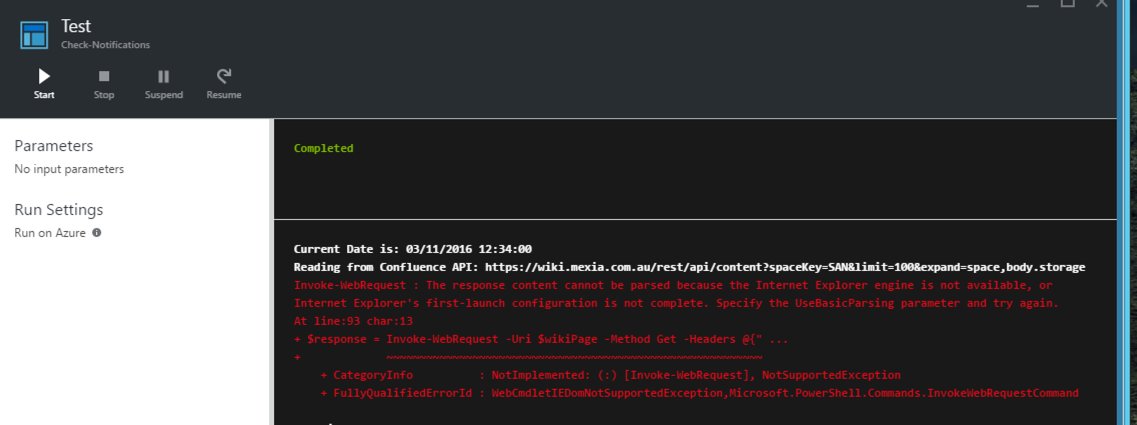
As the error message states, we can just add -UseBasicParsing to our commands and it’s all good? Well not quite.
When you add that switch, it actually changes the returned object type. From a Microsoft.PowerShell.Commands.HtmlWebResponseObject to a Microsoft.PowerShell.Commands.BasicHtmlWebResponseObject, so you need to be aware of what properties you can play with in the object.
We can avoid this by using Invoke-RestMethod which works regardless if you use -UseBasicParsing or not.
Azure Automation
Once we have our PowerShell script working locally, the final step is to host the script in Azure Automation so we get the benefits of running in the cloud.
So what are the advantages of Azure Automation? In summary it supports native PowerShell and it is very cheap!
List of reasons why Azure Automation rocks:
- Native PowerShell support
- Two Tiers available:
- Free: Up to 500 minutes free each month (16 mins a day!)
- Basic: $0.0025/minute (400 mins for $1AU)
- Easy to use and monitor
- Support for Scheduling and WebHooks
- Runbook Gallery available (browsable from the Azure Portal)
Follow these steps to get up and running quickly.
First, log into the Microsoft Azure Portal.
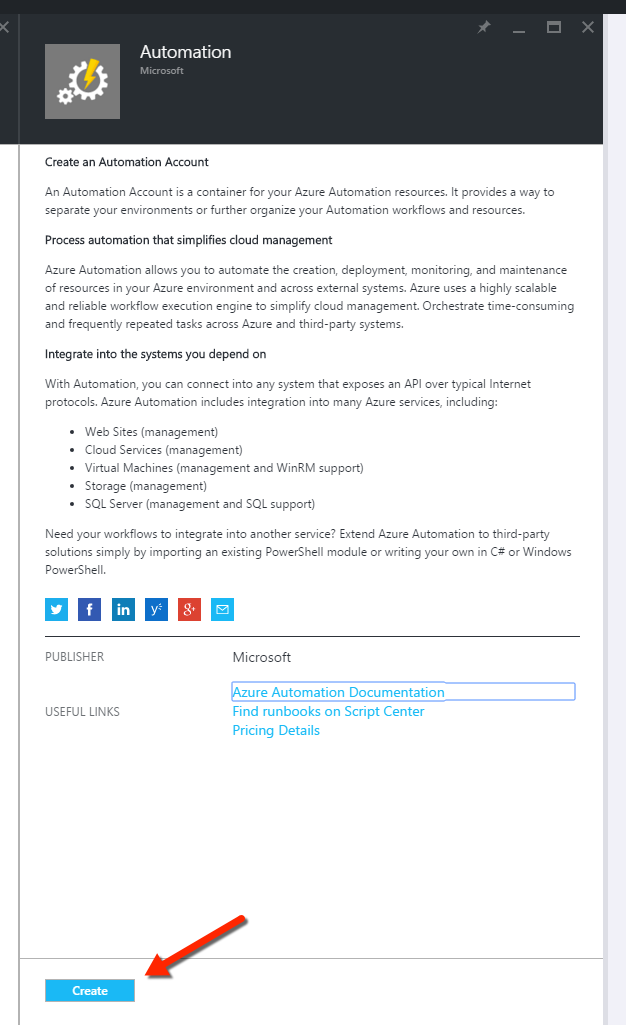
Create Automation Account
Add a new Automation Account, via the + on the main page. Click on Create.
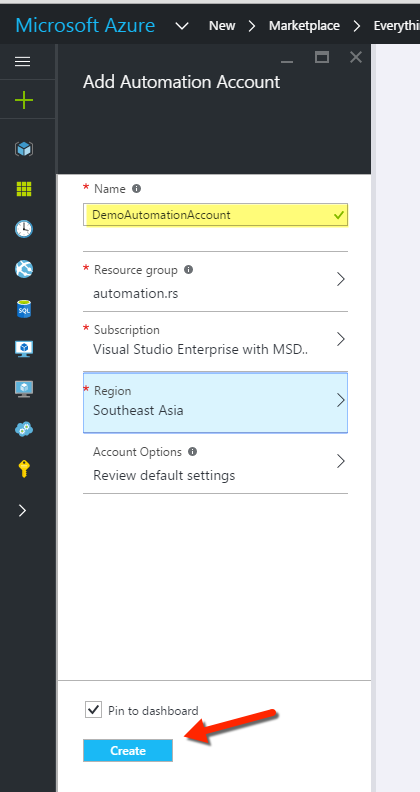
Create a new Automation account. Give it a name and select a location that is nearby and click on Create.
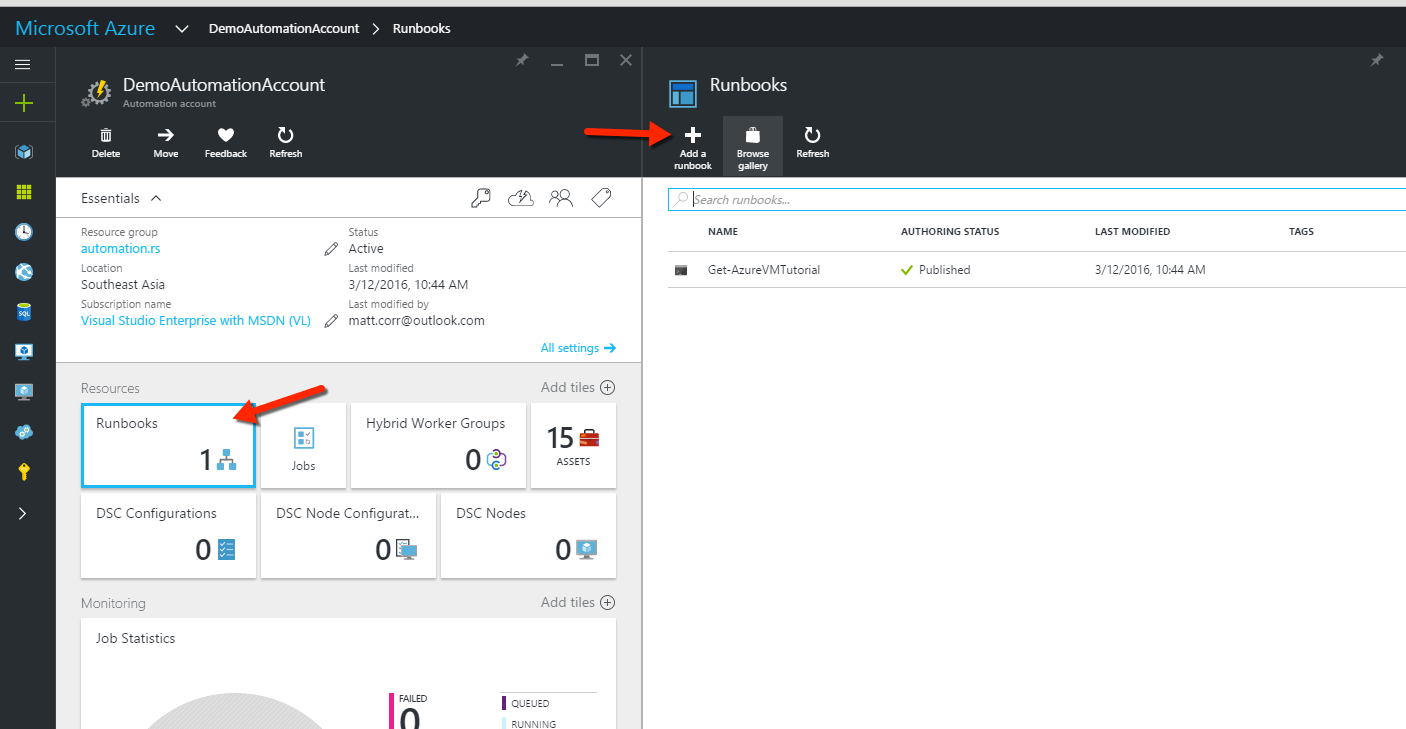
The Automation account panel will appear. Click on the Runbooks button. Then click on Add a runbook.
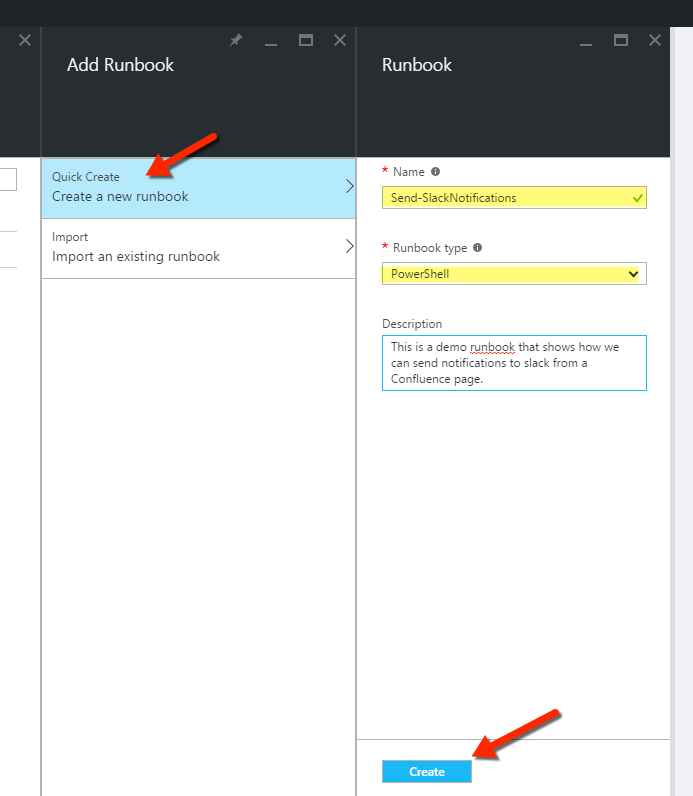
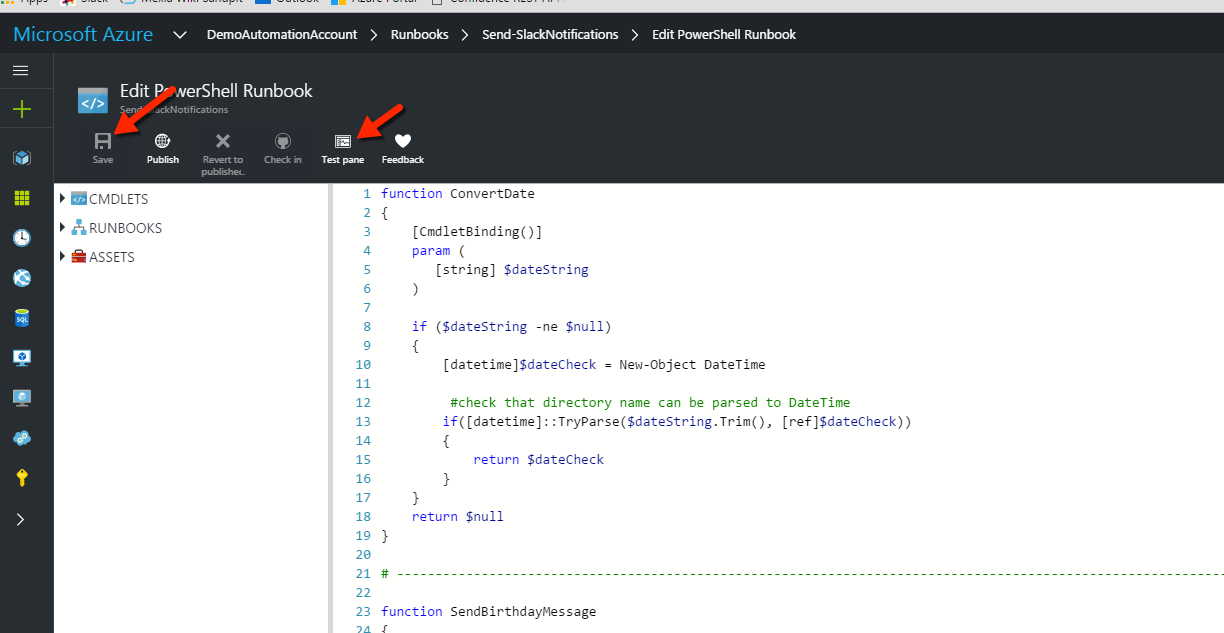
Click on Create a new runbook. Enter a name, set the runbook type to PowerShell and click Create.
Cut and paste the copy of the PowerShell script you have tested locally with your variables to the screen. Make sure you click Save to save the runbook first and then click on the Test pane button.
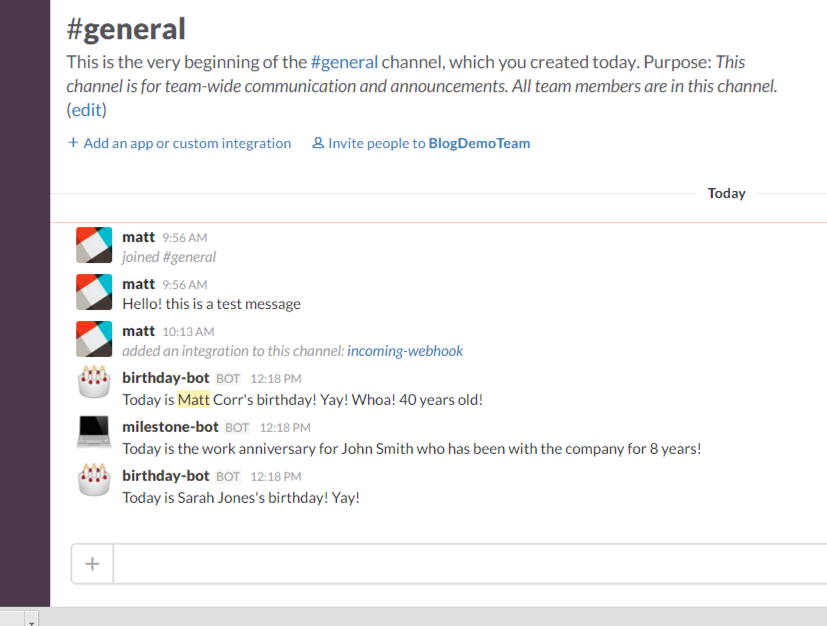
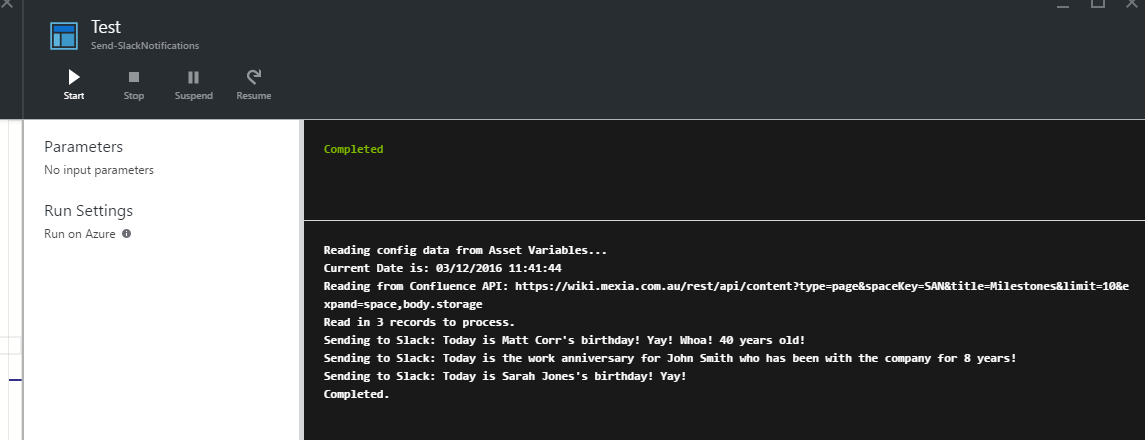
Click on the Start button and you should see the log output appear in the output panel the same as you did when you tested it locally.
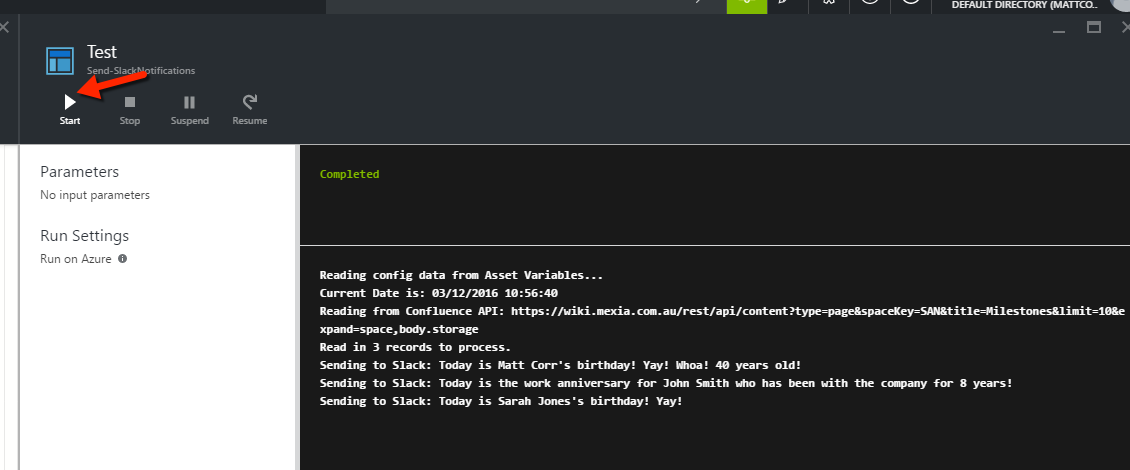
You should also see the notifications appear in your Slack channel.
Add Automation Variables
Now it’s obviously bad practice to hard code variables into your scripts! So we should add some Asset Variables for the six variables you had to define.
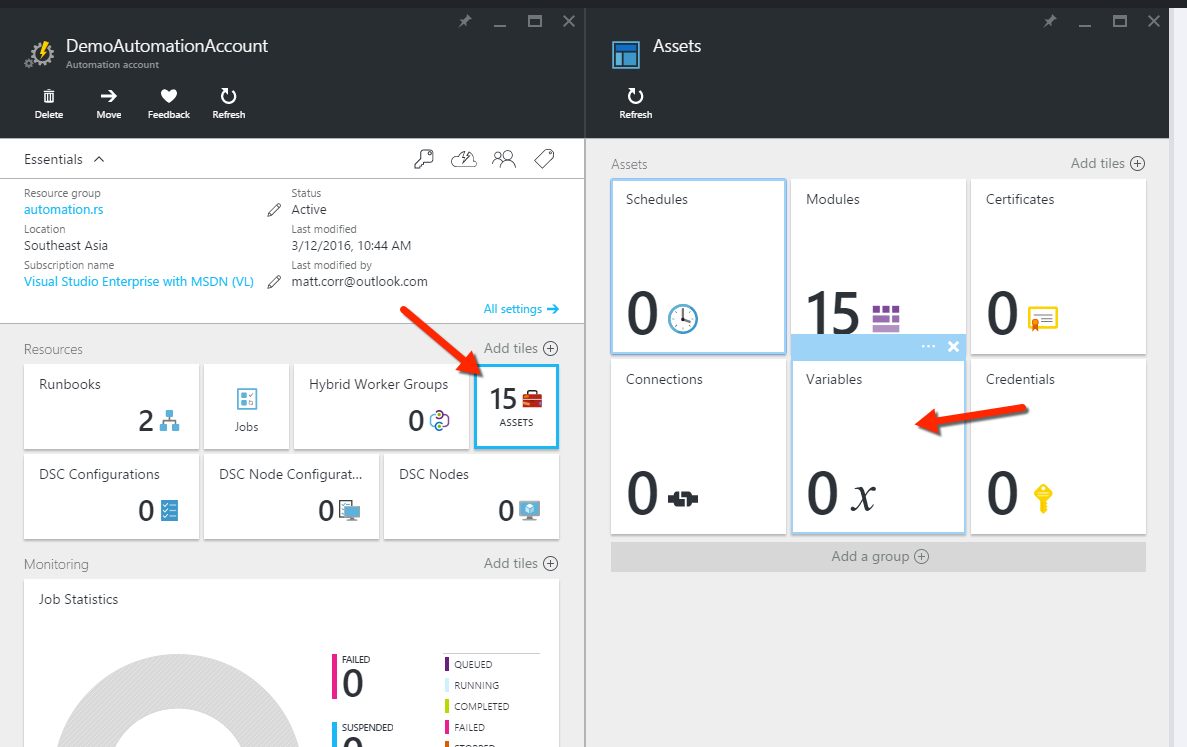
Side the portal window back to the automation main panel. Click on Assets. Click on Variables.
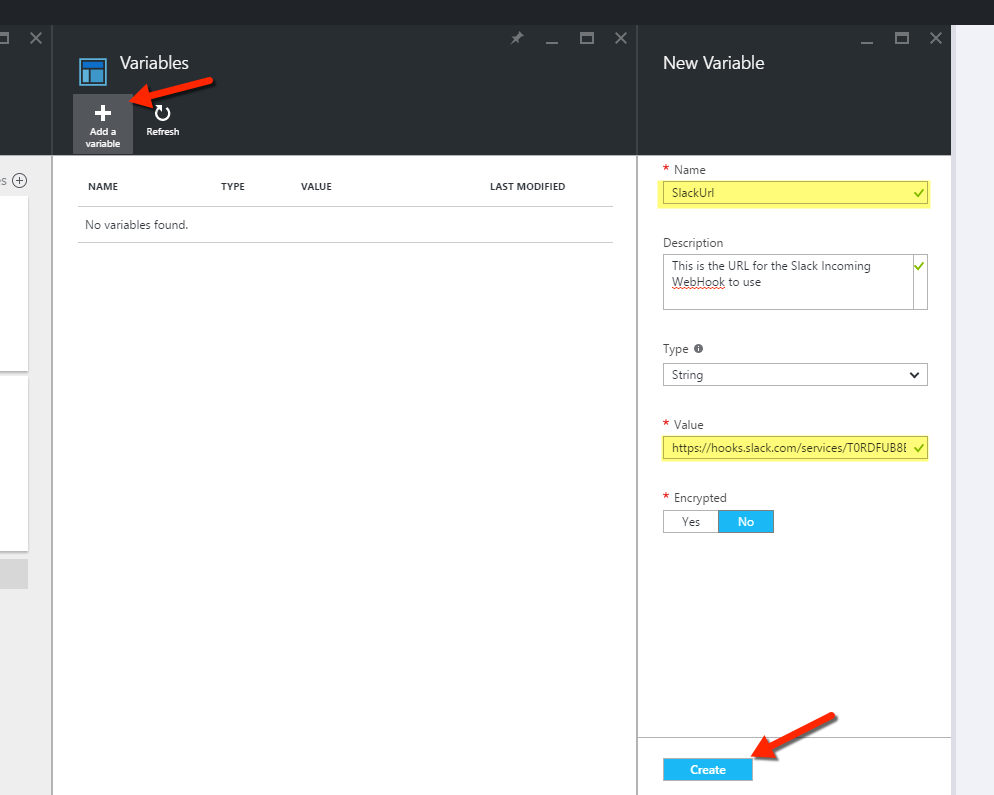
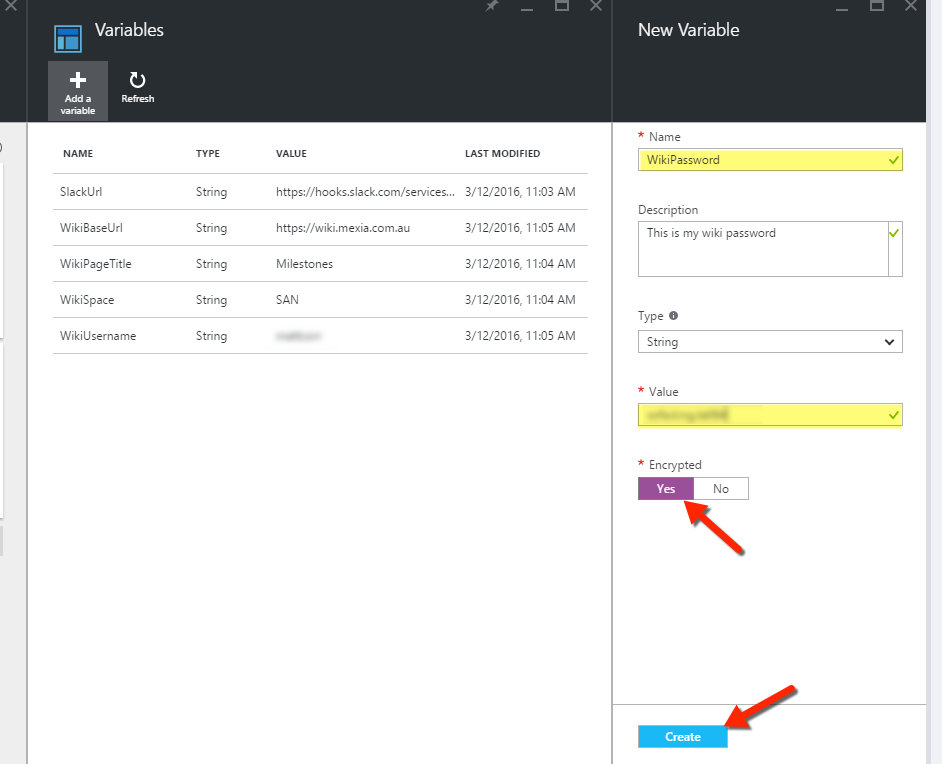
Click Add a variable. Set the Name and Value. You can optionally set the Description too. Click on Create.
Add the following five variables
- SlackUrl - The Slack Webhook URL
- WikiBaseUrl - The base URL for your confluence site
- WikiSpace - The Space key for the space your Wiki page is located
- WikiPageTitle - The title for the wiki page to look up
- WikiUsername - The username of the account to authenticate with
Finally we need to add the Wiki password. Since this is obviously a sensitive field, when we add it, we set the Encrypted flag to True.
Yes the password will initially be visible when you type it in, but once you click Create, you won’t be able to see it again.
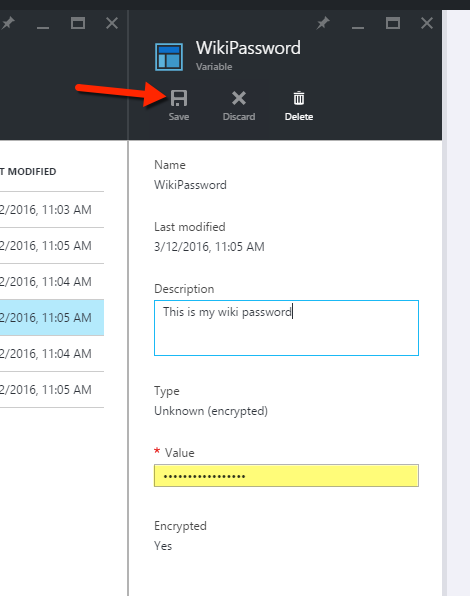
If you try to edit the password, you will get a masked string to edit.
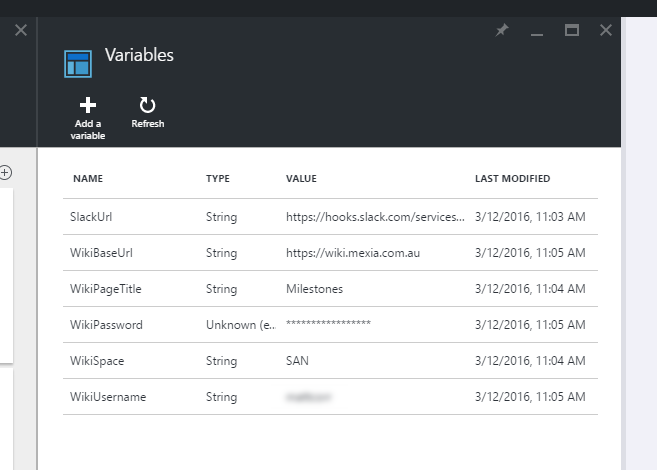
After setting up all the variables, your Asset->Variables panel should look something like this:
Asset variables are great to use as they allow users to update the values without having to touch the scripts that utilise them. This is also good for deployments of scripts across different environments as only the asset variable values would need to change.
Now that our variables are setup within our Automation account. The next step is to update our script to use them.
Edit the runbook again.
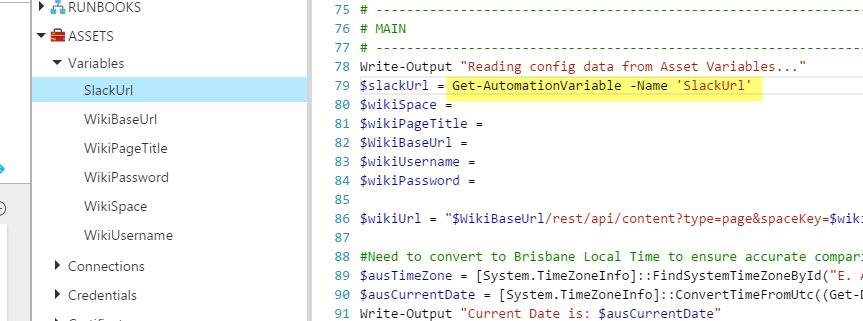
Delete all the hard coded values for the six variables. Move the cursor to just after the “=” of the the first variable. On the left expand out ASSETS and Variables. For the variable on the line where the cursor is, right click and select Add “Get Variable” to canvas.
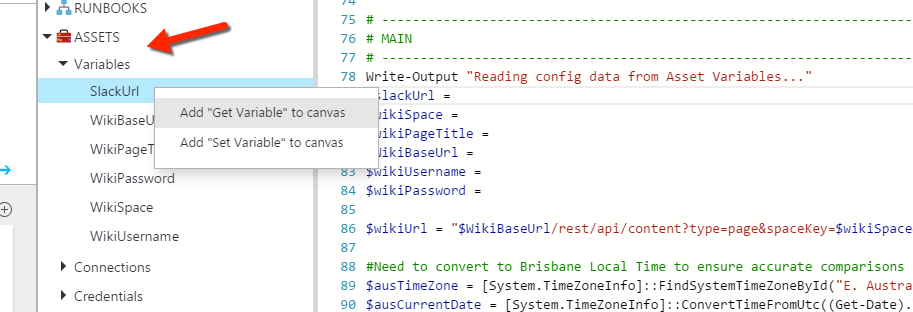
This will insert in code for getting the value from the Automation Asset.
Repeat this for the other five variables. You should end up with something like this:
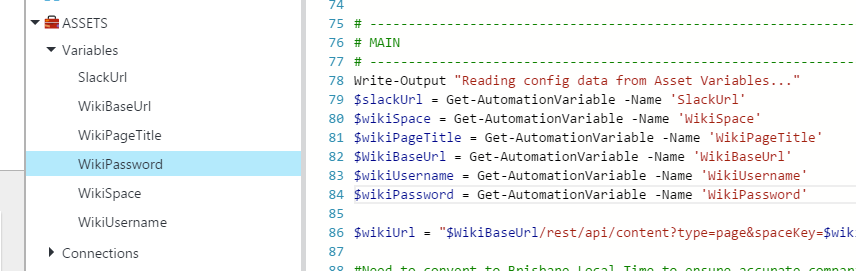
*It is worth double checking that you link up the right asset variables to the PowerShell script variables! * Thats it! Save the file and test it again via the Test Pane to confirm it still works.
Automation Schedule
We are almost done! We have the script working in Azure Automation. We have abstracted out all our variables *(including the sensitive one) *to Automation Assets. All that remains is to add a schedule so this runbook is triggered every day to let us know when the milestones are. We do this by adding and linking a Schedule to the runbook.
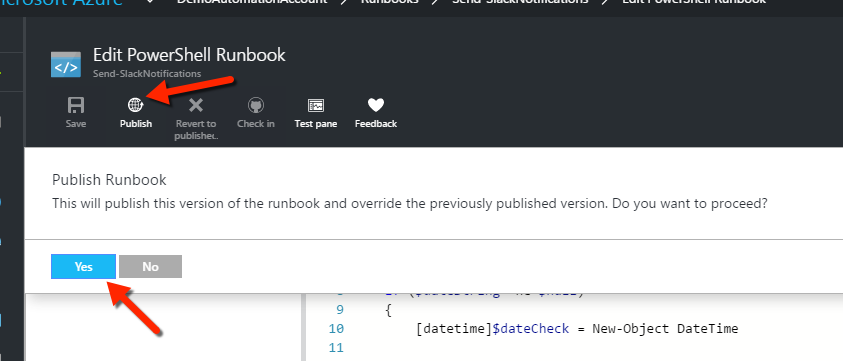
But we first need to publish our runbook before we can add a schedule to it. We do this by clicking the Publish button on the edit runbook panel. Click on Yes to confirm.
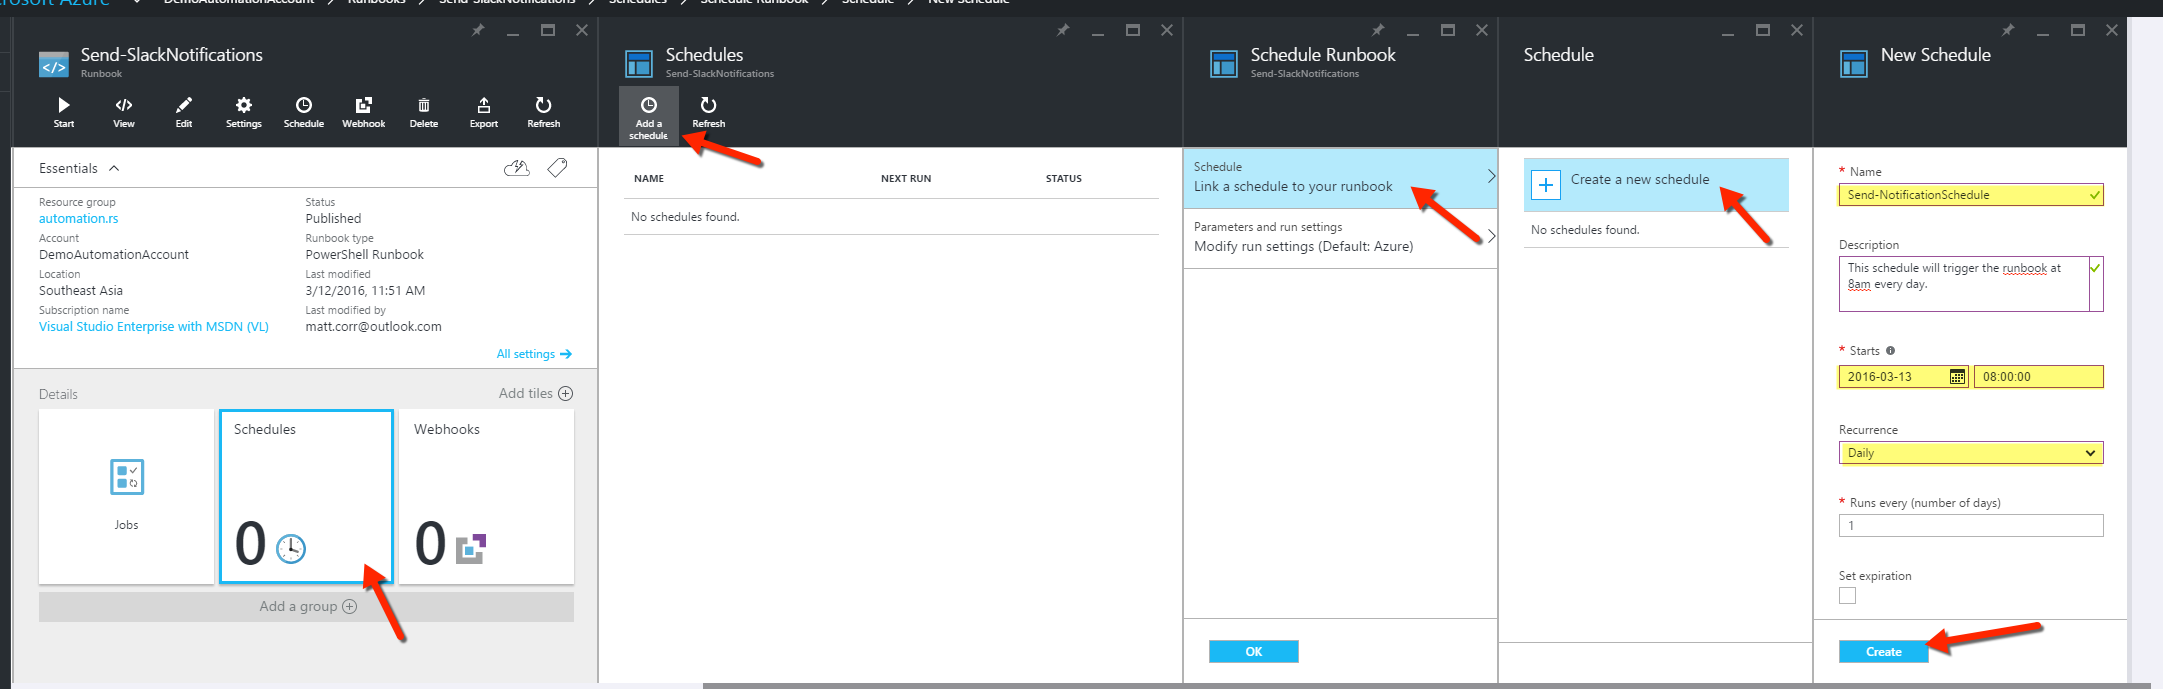
Go back the panel for the runbook we have been editing. Click on Schedules. Click on Add a schedule. Click on Link a schedule to your runbook. Click on Create a new schedule. Give the schedule a name and set it to start at say 8:00am the following day. Set the recurrence to Daily and never expire. Click on Create.
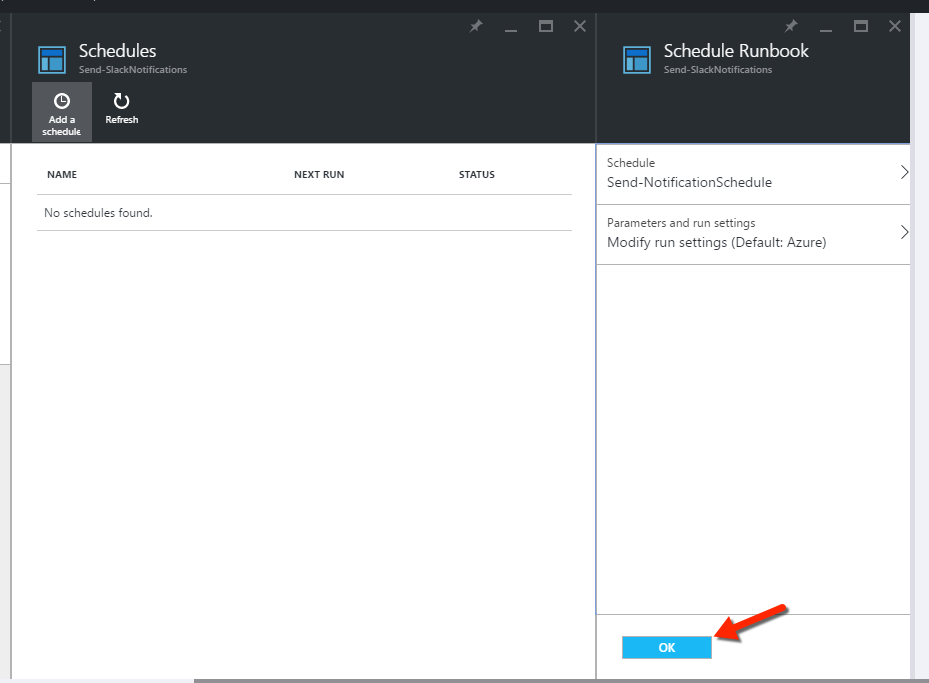
This will create the schedule. To confirm the linking of it to the runbook. Click on OK.
Back at the runbook panel screen the Schedule counter should increment to 1.
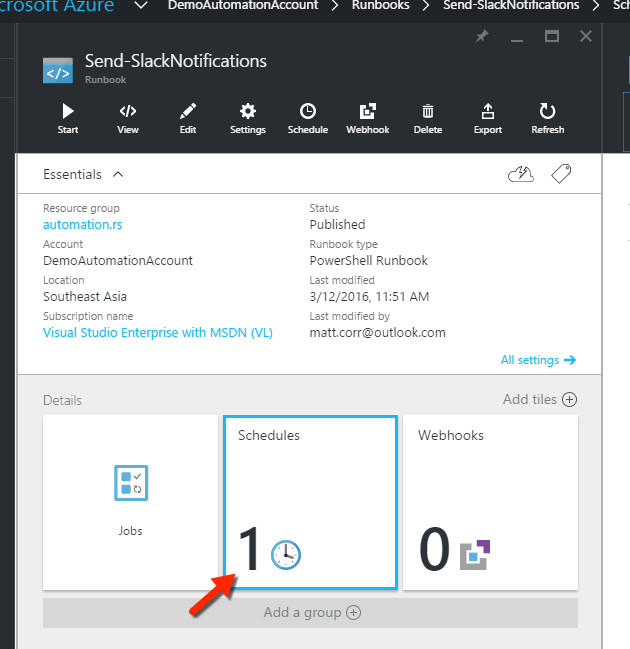
This completes the setup of the schedule to the runbook!
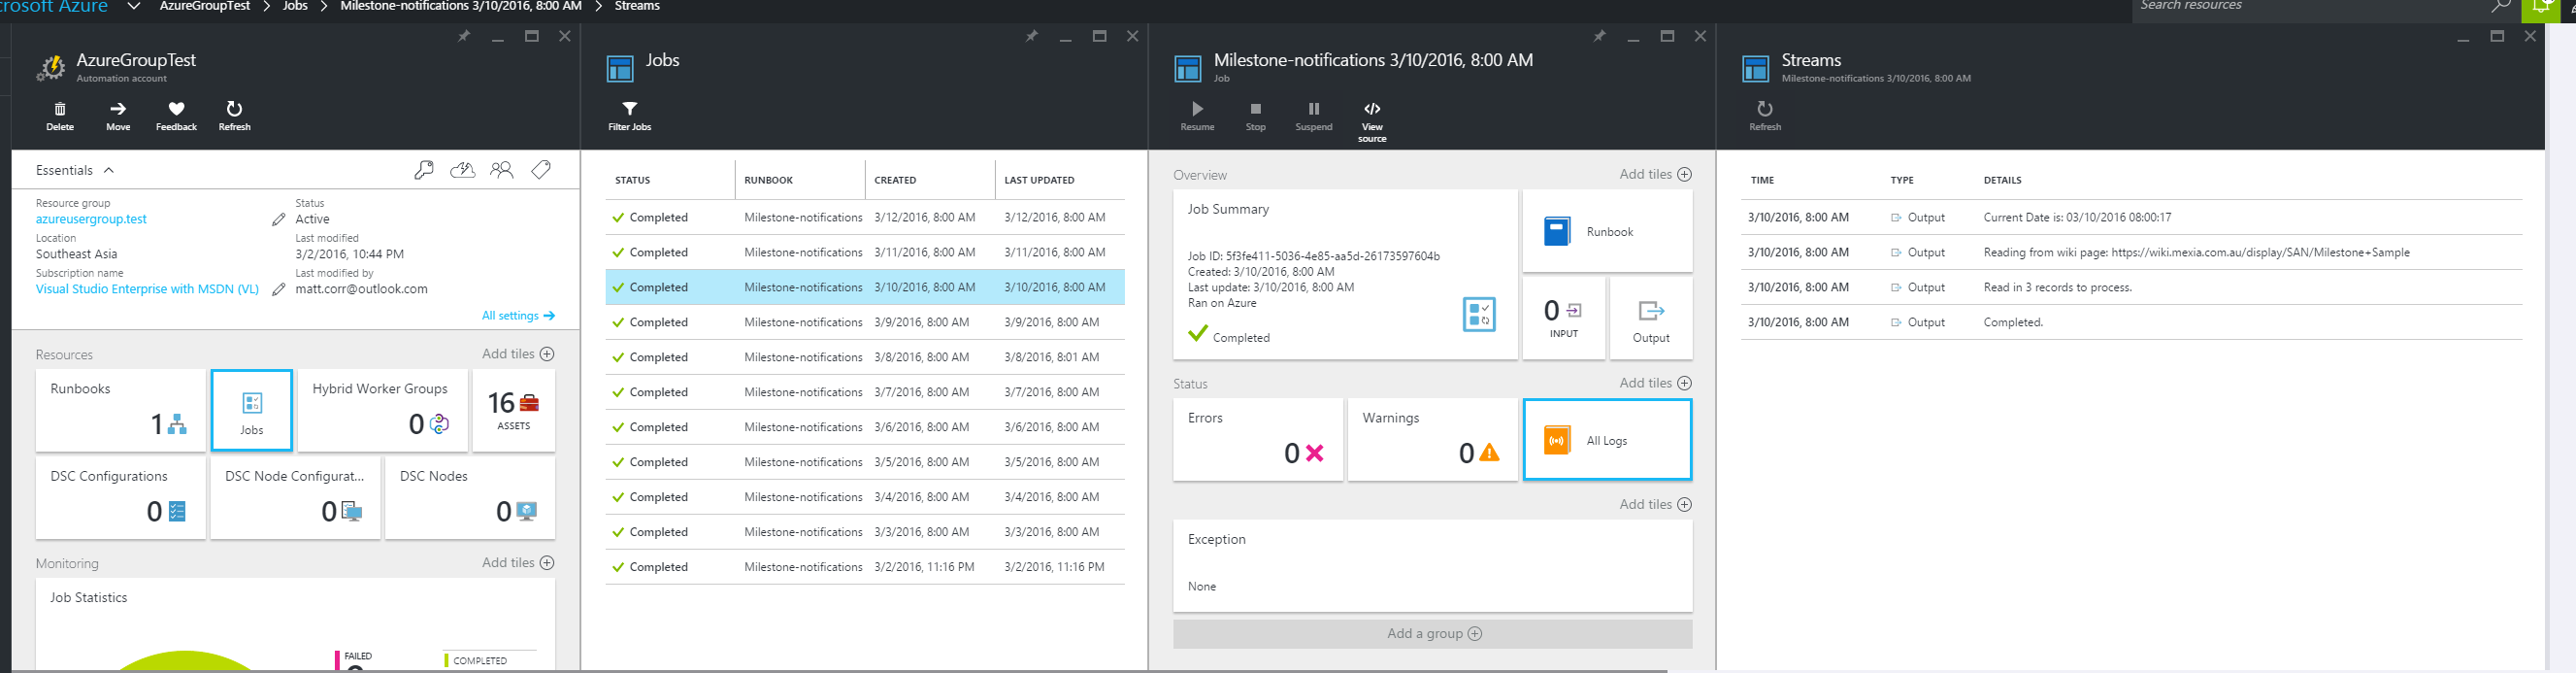
You will be able to track the jobs over time via the Azure portal and see the output on the screen.
NOTE: A job is an instance of a runbook being executed.
This completes this demo! I hope this shows how quick and easily you can utilise Azure Automation for automating notifications from anything to anything!
If you have any questions or suggestions on how I can improve on this, feel free to drop me a line!


Leave a comment